Today (23rd Feb) was one of those special magic days. Woken by the dawn chorus for the first time of the year, then after breakfast a sunny walk together through the orchards. After 11ses, I sat in the sun outside the back door on the chair made by our daughter Nettie a few years ago. Here I worked on the plans for the new shelter in the garden.

The plan is to tuck the shelter in a handy gap in the shade of the hedge.

I drew some rough plans last summer and ordered the required chestnut poles from ‘Say it with Wood’ in the autumn. Aly duly delivered the poles after the Christmas holiday.

After drawing up the detailed plans, I cut some hazel rods to make a tenth scale model.

Then sawed them to length to match the actual chestnut poles: 10@16ft, 6@13ft and 4@10ft. The 8×4 metre tarpaulin arrived a few weeks ago. Deciding on the scale took some thought. I started in imperial units with 2″ to a foot (i.e. 1/6 scale). I then wondered where to put the model so that it would be handy in the next month or so. I remembered a reject wooden drawer from the drying cabinet, so then had to reduce the scale so that it would fit. 1:10 worked nicely, so that lends itself to metric units. I still delight in having the option of choosing whichever units work best in any given situation.

I plan to bury the posts into the ground, so for the model to work, I made use of the bag of crumbly clay that I had left-over from patching the workshop floor a while ago (but that’s another story). Then came the fixings. I reckon on using 10mm bolts or studding, so that meant 1mm pins for the model. I could find nothing that small, neither would a 1mm drill bit fit into my drill chuck, so I ended up using 30mm panel pins, which are just under 2mm diameter. They work very well, cos I can fold them over to hold themselves in place. If the poles are to be buried 50cm, then the clay should come 5cm up the poles on the model.
Triangulation is the key to most structures, although funnily enough, not on my chairs. I intend to use the same system as on the previous workshop at Brookhouse Wood: horizontal beams joined by half-lapping, then fixed onto the top of an X-frame. I’ve searched through my photo collection but can’t find a decent one of this structure in use, so here it is on the model. I’ll try to get a decent pic sometime.
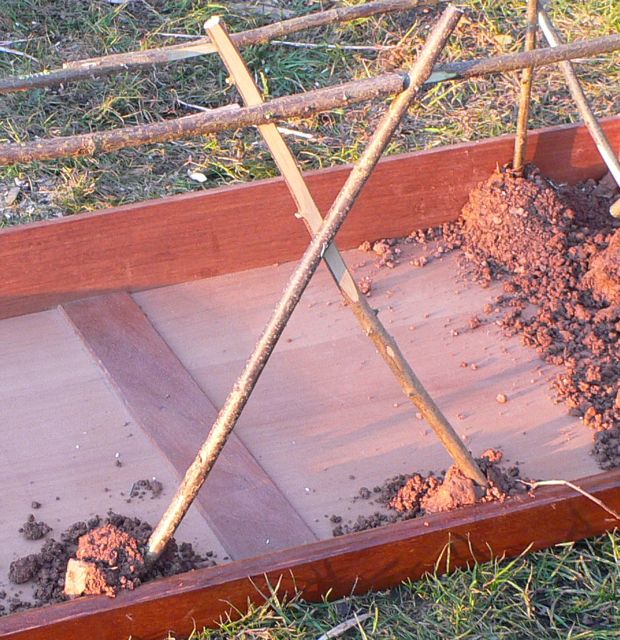
Here’s a pic of the structure as far as I got before the light faded.

I’ll need a few more shorter poles along the back edge and I’ll probably order some sawn 3″x3″ beams to run from the front ridge to the back ridge to help support the tarp. Hopefully I’ll have the model finished tomorrow and then start stripping the chestnut poles.
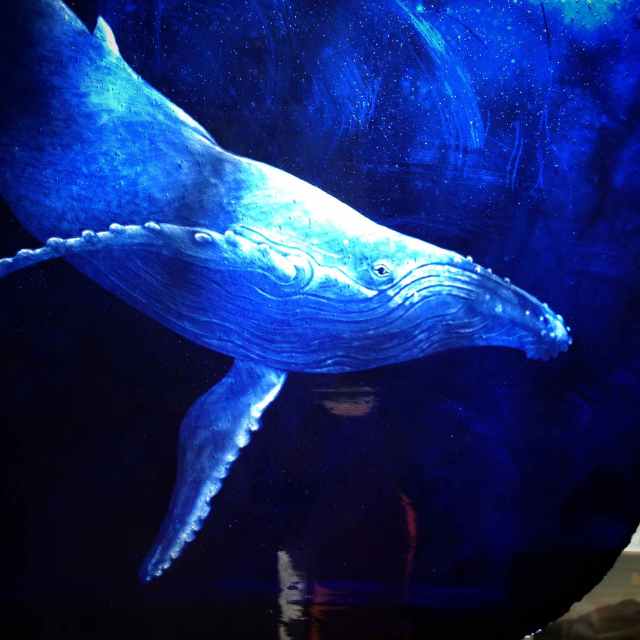
So to finish the day, I took Tamsin a cuppa and she showed me her latest glass-work, this time an engraving – a fabulous whale. It looks even better than this in real life, when held up against the setting sun.
With the last touch of evening light, I returned to the house to prepare the meal just in time for ‘Rock Block’ on Planet Rock, which kicked off with AC/DC playing TNT.
Now the moon is up and the day is still not over. Springtime is what makes life worth living!
