
Champion the Lumber Horse
 See the book Going with the Grain for a whole chapter with over 30 colour photos on the construction of the Lumber horse.
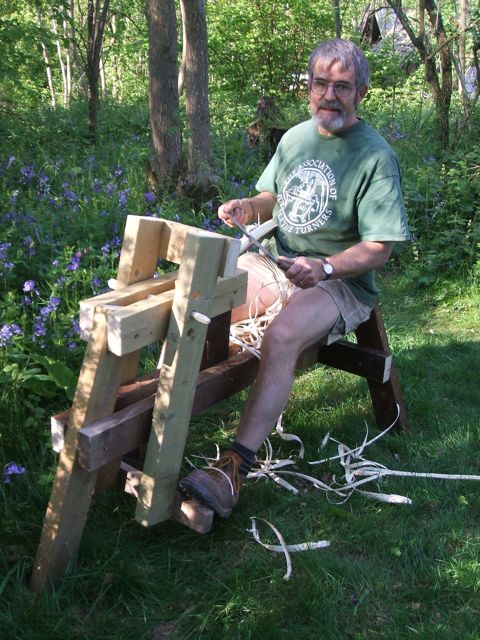
I have been using shaving horses for over thirty years with my original horses being based on pictures from a variety of books on woodland crafts, usually making use of a large lump of wood as the bed.
Now that green woodwork is becoming more popular, I believed it would be helpful to design a shaving horse that could be made using tools and materials that can be easily obtained in the modern world. Despite my lifelong mission to persuade people of the advantages of cleft, unseasoned hardwoods, this design is mostly made from sawn softwood. It needed a name and when I used the term lumber horse, it rung a bell from my childhood TV viewing – Champion the Wonder Horse
I use this design all the time now in preference to the previous designs and the name ‘Champion the Lumber Horse’ has stuck. There are no precise joints needed and the only woodworking skills involved are using a saw and a drill. I suggest you use the sequence below but there’s no reason why you shouldn’t assemble it any way that takes your fancy.
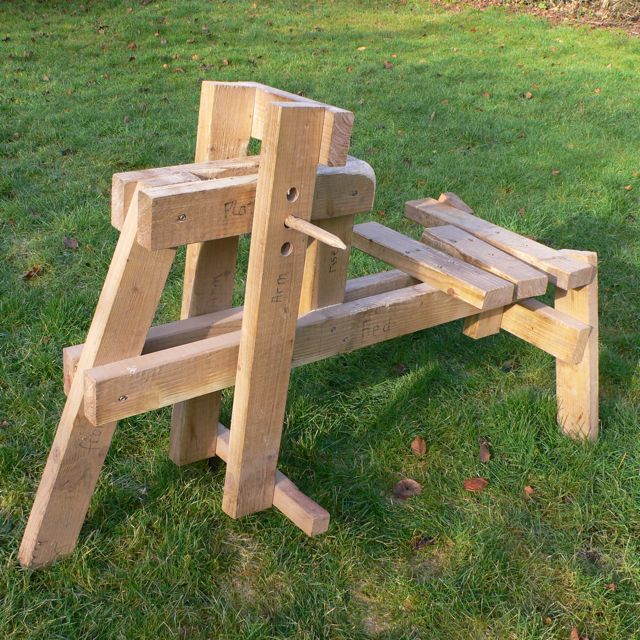
Making Champion the Lumber Horse
Materials
Four 8ft (240cm) lengths of 4” x 2” (100 x 50mm) softwood
A 50cm length of 2” x 1” batten for the footrest
A straight wooden rod, dowel, or turned pin about ¾” (20mm) diameter for a pivot
About forty 90mm heavy screws (ideally turbo coach screws, available from Screwfix) or nails
Tools needed
Handsaw
Tape measure
Pencil
25mm drill bit in a brace, a bar auger, or a drill press
Powerful cordless drill with 6mm hex nut driver or screwdriver head (or hammer)
Saw the beams to length (given in cm)
| Bed x 2 | 120 | 120 | 240 | ||||
| Arm x 2, front leg, | 80 | 80 | 80 | 240 | |||
| Seat x 3, platform x 2, rear spacer | 40 | 40 | 40 | 50 | 50 | 20 | 240 |
| Back legs x 2, leg brace, top bar, riser | 55 | 55 | 60 | 30 | 40 | 240 |
Pre-drill the large holes
You are going to need several 25mm (1”) holes in the platform and arms of the horse. You could fairly easily drill these when the horse has been assembled but you may find it easier to drill them before assembly. In which case start by drilling at least two holes in each half of the platform and three in each arm as illustrated.
Assemble the main body
Start by assembling the main body with the front leg and the platform. Then add the seat and the back legs. Make the frame and fit it over the completed body. Take care that the screws (or nails) are not right at the end of any components, as they would be likely to split the wood.
- Fix one section of the main body to the front leg, the central riser and the back spacer, using just one screw at each joint.
- Fix one of the platform sections to the tops of the front leg and the riser so that it is about parallel with the body section
- Turn the whole assembly over and lay it down with the riser about square to the bed and with the front leg sloping.
- Fix the other sides of the body and the platform with a couple of screws at each joint.
- Stand the horse on its front leg and prop up the back end so that the bed is about horizontal
- Fix the seat components to the back of the body
- Fix the leg brace to the rear spacer tight up against the underside of the body
- Fix the legs to the back of the seat and to the leg brace with the tops of the legs just protruding above the seat.
Assemble and fit the arms
- Screw the top bar to the arms as shown, so that the resulting frame will fit over the horses body. The footrest could be another 50cm length of 4″ x 2″, a strong length of 2″x1″ or anything in between and should be screwed onto the bottom of the arms as shown.
- Lift up the front of the horse and slide the arms into place and pivot them with a short hazel rod, a length of dowelling, a length of broom-handle or a specially made 21mm (7/8″) wooden pin. This pin works best if it is tapered at one end to make it easier to poke in when adjusting the gap.
Notes
- Alternatively you could pivot the arms with a metal pin, in which case the holes in the platform and the arms could be smaller than 25mm.
- If you need to dissemble the horse, the rear leg assembly is easily removed by simply removing the three screws holding the tops of the legs to the seat and the leg brace to the rear spacer.
- You could trim the angles off the tops and bottoms of the legs but the tops of the back legs can be very handy as a bench-stop when the horse is in use.

You must be logged in to post a comment.